Part 2
Ring Soul
Character Abilities/Ultimate Weapons or Armour
Lottery Members
Crests
Straw Millionaire
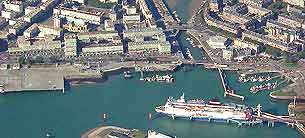
Cannes
- Seal of Force: flowers, far side, mid-level of town.
- Daruma Doll: Aspiring Director Ijichi, walking around, mid-level of town. Part of the Straw Millionaire sidequest.
- Lottery Ticket: under streetlamp, mid-level of town, top of the stairs.
- Grass Oil: fountain at the bottom of the stairs to the lowest level of town.
- Treasure: Dawn: man in white, lowest level of town.
- Limestone Block: Wannabe Film Critic, lowest level of town. Part of the Straw Millionaire sidequest.
- Lottery 13: under the Convenir awning.
- Mr. Samurai: buy a drink for Anatol, in the bar near the man in white.
- Western Belt: chest at the end of the pier.
St Marguerite Island
Blanca
- Camio: left of save point.
Yuri
- Lottery Ticket: in first junk room, top of stairs.
- Face Guard: In E-shaped room, south east corner.
- Lottery 12: one of the cells, E-shaped room.
Veronica's Game
Blanca
- Wolf Bout 5: automatic
If you get through this section without being seen by any guards, you win a zodiac bracelet.
- Bifrons: if you end up fighting the two guards (one of whom is on the other side of the fence) you can grab this now. It's by the fence.
- Tent: end of the corridor with the more alert guard.
- Wheel of Fortune: read Treasure: Dawn and check the end of Oscar's chain after defeating him.
- Strike Expand: chest in the room with Oscar.
- Sp-Defend Down 2: pile of boxes to the right of the cells.
- Weapon/Third Key: chest beside cell, depending on Veronica's game.
Yuri
Ring Soul: north-eastern corner of the room before the stairs.
After speaking to Locke, head east, and you'll see a red iron door along the south wall. Open it - it's a path back to the beginning. Then go down the stairs in the double stairway, near Locke.
- Daphne Fruit: chest.
- - Seal of Strength: Iron Maiden, lab just before the room like Oscar's.
- Lottery Ticket: in the room like Oscar's, at the end of the raised left side.
- Earthen Pipe: in the room like Oscar's.
- Pure Root: chest in the room like Oscar's.
- Adhesive: junk room near the beginning, before the number-locked door (if you go up the stairs after the room like Oscar's, you'll be back here. Or, if you go through the red iron door).
Go back to the stairway and go up this time.
- Thera Extract: chest, left of door.
- Fountain Pen: on desk.
Go back down the stairs, and go east, past the red iron door. You'll be back in the room with the Bifrons chest. Examine a hole in the western wall.
Blanca
- Bent Wire: automatic.
Yuri
- Handmade Key: from Locke.
- Nibelung Scene 2: automatic.
Cannes
- Treasure: Love: from Lord Croft who gave you Treasure: Dawn.
Petrograd
Palace
- Seal of Life: head south. It's in the chest in the second open room to the right.
- P-Attack Down 2: when you finally reach the north-south path between the east and west wings, it's in the south-west corner.
- The Empress: under teddy bear, room with save point.
- Mana Root: room with the save point, west hallway.
City
- Pure Root: chest outside Edgar's shop.
Head down to the west and you'll eventually hit the area outside the palace.
- Hit Area Expand: chest, left of the tunnel back to Edgars.
- Seal of Wisdom: near lamppost, near obelisk.
- Fircas: in front of palace, to the right.
Head back to Edgar's, then go down the road to the south.
- P-Defend Down 2: corner, where the road turns to the east.
- Strike Expand: lamppost to the left of the bridge.
- Aqua Raise Album: take a snapshot of Pendulum.
- Mana Seed: alleyway by the bridge, near the boxes (you'll need to come back, as you're automatically dragged to Edgar's shop).
- Lottery Ticket: behind Edgar's counter.
- Nibelung Scene 5: Old Boris, on the way to the palace.
- Super Piroshki: trade Limestone Block to Chagall, next to Gerard. Part of the Straw Millionaire sidequest.
- Holy Easter Egg: trade Daruma Doll to Edgar. Warning; this trade does not lead to the good items. Part of the Straw Millionaire sidequest.
Palace
- Lottery Ticket: flowerpot, ground floor, west corridor of the palace.
- Espada: chest in the most north-western room on the ground floor of the palace.
- Circlet: the room behind the Great Hall, beside the bed.
- Eligos: you'll now be able to get to the far nothern end of the ground floor of the palace. The crest is in the room between the stairs.
- Bell Bracelet: top of the stairs, on the left.
- Pirate Earrings: west wing, near in the room the guard was blocking, near the Great Hall. It's just north of the save point.
- Lion Shrine Key: Gleaming at you like a gleaming glowing unmissable thing after the battle.
A few things to take care of...
- Wolf Bout 6: Petrograd, in the alleyway where Anastasia hid, earlier on.
- Talking Panda: trade the Super Piroshki in Champs Elysees. Part of the Straw Millionaire sidequest.
- Fine Tea Set: trade the super Piroshki in Florence. Part of the Straw Millionaire sidequest.
Goreme Valley
- Marax: chest opposite Gerard.
- Pure Root: trade Holy Easter Egg to Pious Hakan. Warning; this trade ends the quest. Part of the Straw Millionaire sidequest.
- Burning Candle: trade Super Piroshki to man in white near the entrance. Warning: this is a bad trade. Part of the Straw Millionaire sidequest.
The Pit Fights unlock automatically here.
- Seal of Aura: go through the rightmost door, immediately after you get through the entrance tunnel. It's in a chest.
- Seere: head up the stairs to the eastern side of town, where it opens on to the sky. You'll find it near the pillar. This is Treasure:love.
- Lottery Ticket: go through the rightmost door after the stairs.
- Blue Cape: Head through the Sages of the Sword door. It's in a room off to the east.
Ring Soul - in the room where Bishop Jarvis is waiting.
- Evasion Down 2: behind the altar in the chapel.
Karin Can Fuck Right Off
- Third Key: from the room with the save point, go north.
- Glass Key: in the mirror version of the first room. From the room with the save point, exit to the south and go through the opening in the right hand wall. Follow the path around without going through any mirrors and you'll find it.
Petrograd (Again)
Tunnels
- Nibelung Scene 8: examine the skeleton by the save point.
- Thera Root: on the first corner.
- Lottery Ticket: south of the E switch.
- Wolf Bout 7: in a cell along the north-south wall just before you get to the ring soul.
Ring Soul: North-eastern most corner of the dungeon.
- Leraje: south of Ring Soul.
- The Magician: northwest of the E gate, in the corner.
- Leonardo's Bear: east of The Magician.
- Andromalius: southwest corner of the coffin room, across from the save point.
- Seal 2: from the save point, go south and west, and it's in a treasure chest.
- Talisman of Luck: hidden in a skeleton near Seal 2.
- Strongoids: from the coffin room, keep heading west and it's near a gate.
- Plastron: near the b switch.
- Silver Locket: behind the b gate.
Hermitage
- Talisman of Mercy: fountain in courtyard.
- Ipos: chest, western edge of courtyard.
- Mr. Swan: from Cyril the Guard after the battle.
- Tissues: By the side of the bed in Rasputin's room. It's in the east hall, just south of the save point.
- Purple Bondage: by the side of the bed in Rasputin's room.
- Silver Angel: in the snow where you fought Veronica.
- Lottery 11: Natalya, a maid in a room in the eastern wing. It's the room just down from the save point.
- Frozen Tuna: outside the Hermitage, just to the left of the entrance.
- Panoramic Lens: Edgar's shop.
Part 4
Sunday, 23 March 2014
Shadow Hearts Covenant: Veronica
A quick list of who's thinking what in the dungeon of St Marguerite Island.
"Ulp, she's looking this way...!" - Yuri
"Fine. Let me at her!" - Karin
"I just might like the kinky stuff..." - Geppeto
"Sometimes, a man's got to stand!" - Joachim
".........(I won't look at her...)" - Lucia
If you pick the first option three times - and so, avoid being tortured - you'll get a weapon. Otherwise, a third key. That's a callback to the first game, when you could unlock an extra area in Asia by having Alice avoid being electrocuted.
There's more info on this here (which I found only after I personally tested the list above!).
Tuesday, 18 March 2014
Shadow Hearts: Covenant - Spoiler-Free Item Guide Part 2, Rhonnda Mine to Wales (2)
Part 1
Ring Soul
Character Abilities/Ultimate Weapons or Armour
Lottery Members
Crests
Rhondda Mine
Ground Floor
From the entrance, take the first left turn. This section is a dead end, so you'll be returning to this junction.
- Lottery Ticket: first western corner. Just go straight along the path, ignoring the dead-end off to the north and you can't miss it.
- Mana Seed: from the lottery ticket, go north then south.
Head back to the first junction, and north to the save point.
- Thera Seed: Take the northern-most path from the save point and it's in the dead end.
- Thera Seed: follow the southern path from the save point and it's in the eastern corner.
- Whetstone: from the second Thera Seed, head as far north-east as you can, and it's in a little dead-end pointing south.
To get the lift down, go to the north-western most corner.
- Lottery Ticket: on the north wall right before the lift.
B1
Ring Soul: south of lift.
You'll find that much of this floor is blocked. There's a lift to the south.
B2 subset
- Lantern: north. There's a save point down here.
Go back up.
B1
- Seal of Speed: from the lift, backtrack a little and take the northern path first. The seal's at the end.
Go back to the southern turn-off for the lift, and go west. You'll soon come to a north-south junction.
- Fine Rapier: north then west. Go back to the junction.
- Pure Seed: Go south as far as possible.
- Lottery 14: from the Pure Seed, go north and take the path east. Follow it up and round, and take the western turn-off until you come to a dead end. I suggest skipping it now and running back after the next save point (hint: blind ring).
- Studded Belt: backtrack to the last junction before Lottery 14 and go north. It's in the dead-end to the east.
You can find Gerard to the north, and lift to the south. There's a save point just after you go down.
B2
- Pure Seed: Just to the south of the lift in a little alcove.
- Seal of Strength: chest in the large chamber where you fight the boss.
Wales
- Seal of Life: chest near Yuri.
- Hit Area Expand: head south; there's a little path heading east, the Hit Area Expand is in a chest at the end.
Ring Soul: Near the eastern side of Roger's house.
- Bearclaw: chest southwest of Roger's house.
- Lottery Ticket: inside Roger's house, lowest level opposite save point.
- Forneus: chest near save point.
Florence
- Strike Expand: in Carla's place, behind statue.
- Thera Seed: Chest to left of Carla's place.
- Nibelung Scene 7: man by the fountain.
- Mr Matador: maid near the fountain.
- Vepar: in fountain.
- Wolf Bout 3: left of save point.
- Underground Film: Straw Millionaire Sidequest. Man near Wolf Bout 3.
- Bat's Gold: chest near shop.
- Lottery Ticket: chest in doorway, far left of save point.
- Pedometer: automatic.
Manmariana Island
- Hit Area Expand: chest, clearly visible after scripted battle.
Head up the right stairway.
- Pure Seed: chest in round room.
- Seal of the Soul: near lamp on left side of corridor after round room.
Ring Soul: room on the right of long corridor.
- Lottery Ticket: edge of Ring Soul room.
- Libra, Aries, Capricorn Tile: chest in Ring Soul Room.
- Star Key: chest in room at end of long corridor.
Go back to the main room (with the save point) and use the star key to unlock the door at the top of the left stairs.
- Sagittarius, Pisces, and Scorpio Tile: chest in room on left side of long corridor.
- Gemini, Leo and Cancer Tile: after blood door.
- Petrify 1: open blood door with right person (the right answer's in this post, if you can't be bothered to work it out!)
Go back down to the save point, then through the door to the north.
- Virgo, Aquarius, Taurus Tiles: in room with zodiac doors.
- Fifth Key: chest through left door.
- Thera Seed: chest through middle door.
- Feather Bracelet: in large room with save point. Plant near middle door.
SG Italian Branch HQ
- Delay 1: chest, first room.
- Uvall: chest near piano. You can complete another area now.
- Thera Root: chest south-west of library.
- Lottery Ticket: south-east corner of library.
- Hit Area Expand: chest, north-west corner of second library.
- Toggle Switch: chest in barrel room.
- Seal of the Urn: in barrel room, near Toggle Switch chest.
- Strongoids: Chest in barrel room.
- Talisman of Mercy: first room of third floor.
- Wolf Bout 4: third floor, after boss.
Wales (2)
Red Post Box - outside Roger's House.
Rope Ladder - chest near save point, Roger's House.
Neam Ruins
- Face Guard: near save point.
- Mana Seed: north-east corner of 1st floor.
- Talisman of Luck: north-west corner of 1st floor.
- Hit Area Expand: near second switch, B1.
- Thera Seed: west side of B1.
- Seal of Vitality: After second light bridge, B2.
- Lottery Ticket: west side of B2 - use the pink button until the bridges go the right way.
- Leonardo's Bear: northeast corner of B3.
- Phenex: east of B3. You'll need to use a block to go up. You can complete another area now.
- Getitup!: south corner of B3. You'll need to walk over an orange block.
- Berith: complete optional stair puzzle.
Ring Soul - southeast corner of room with save point.
- Mana Extract: take the optional light bridge towards the corner.
Part 3
Sunday, 16 March 2014
Pillow-Fighting Queen
This game is kind of like an upgrading/rpg/street fighter game. With pillows.
You're playing a little girl. She has pig-tails and a flouncy dress, and you can customise the colours of both. Her one goal in life is to become the ultimate pillow-fighting queen, and you can help her do this through winning matches, gaining cash for upgrades, and levelling up by gaining experience.
The main upgrade screen is her bedroom. You can see a world map, a door, a window, a shelf, and a bed.
This little girl - Amelia, for the sake of argument - can only work on her pillow-fighting skills between the hours of 6pm and 10pm. You can click on the door to go out and do jobs, click on the window to check on and upgrade your vehicle, click on the shelf to train, and click on the bed to upgrade your weapons/armour (teddy bears and pillows).
You earn money to buy those things either by winning matches, or by doing odd-jobs. At first, you only have time to do odd jobs within your own house, for pocket money. Then, as you get a little richer, you can buy a bicycle, and go further away. As you increase your vehicles - from your own two feet, to a bike, to a motorbike, to cars, to planes, to helicopters, to the ultimate nuclear-powered warping machine - you increase the distance you can travel and the range of jobs you can do. Jobs further away are more lucrative, and you can do them more as you decrease the travel time.
Upgrading your vehicle also allows you to reach matches that are further away. The first match you can take part in is against your own sister. It's a training match, so unlike the others, you can't repeat it. As you upgrade your vehicle, you can travel further away, first to the neighbours, then to London, where you fight Beefeaters outside Buckingham Palace, to India where you fight atop moving trains, to New York where you fight alongside cops and criminals, to Boston, where you fight racers in the Boston Marathon, to Australia where one of your opponents is a kangaroo, and so on. Battles are fought battle royale style against multiple opponents, who won't automatically come after you. Your fame metre rises as you win more matches, increasing your opponents desire to take you out over everyone else. If you lose matches your fame goes back down, making matches a little bit easier.
Your weapons/armour upgrade from a small teddy and a basic pillow through to the BFBear and the BFPillow. You can also win rare items in random drops, for example, the hostel pillow and the mascot bear. You are also given nightdresses by triggering random events - for example, if you beat the Beefeaters a certain amount of time, the queen sends you a Union Jack nightdress and a note, which is delivered by your puzzled parents in a cut scene the next day. Speaking of parents, every so often you'll see cut scenes of them looking puzzled at seeing a brand new car hidden in the garage or a helicopter on the roof.
As you meet certain criteria, which includes winning a certain amount of matches, perhaps by a specific margin, you are crowned Queen of each area, which builds up a shelf of tiaras, which are displayed in your room. As mentioned above, you can click on this shelf to train, which is one of the only ways to gain experience (the other way is by fighting matches). This means giving up a chance to earn money or to shop, as all of these things take up the time you have before matches.
Once your entire map is gold, ie, you have been crowned queen of each area, you will receive an invitation to a special battle...in your own home. In a plot twist, it's against your pissed-off sister (remember, you beat her right back at the beginning?) and your mother, the former champion.
I dreamt this whole thing last night. So far, it doesn't exist outside my head.
Friday, 14 March 2014
Shadow Hearts Covenant: Blood Types
In Shadow Hearts: Covenant there's a door that will only open for people with a specific blood-type (or, rather, if you open it with someone else, the treasure will disappear). There's a little puzzle you can do to find out their blood types, and the results are as follows.
Karin - type A.
Lucia - type B.
Yuri - type O.
Joachim - type A.
Gepetto - type AB.
In Japan, blood types are used as personality markers, kind of like how horoscopes are in the West. So it makes sense that this door is in an area with a zodiac puzzle! The wiki article, here, has a chart listing the traits individuals of each blood type are supposed to have.
Like Karin and Joachim, I'm type A. I know this because I donate blood, and my twelfth donation is coming up soon. Save a life - if you're in the UK, you can make an appointment here.
Anyway, type A individuals are supposedly earnest, creative, sensible, reserved, patient, and responsible. Our worst traits are being fastidious, overearnest, stubborn, and tense. I'm also a Leo (creative, noble, loyal) born in the year of the earth dragon (1988), which makes me magnanimous, stately, vigorous, strong, self-assured, proud, noble, direct, dignified, and passionate but also tactless, arrogant, imperious, tyrannical, demanding, rebellious, intolerant, dogmatic, violent, and impetuous. I never realised how many traits Leos and Dragons supposedly shared until I went and looked that up here.
Horoscopes are worked out based on which constellation the sun appeared to be when you were born. Apparently, where the other planets - including the moon - where at the time also have an effect on your personality. For instance, in my case, the moon was also in Leo, so I get a double whammy. The moon supposedly affects how you deal with things internally, while, for instance, Mars indicates your temper and Venus is how you love. The constellation that appeared on the horizon at the time of your birth indicates how you initially come across. That changes every two and half hours or so. Your midheaven is the sign directly above you when you were born, and that indicates how you go after your goals.
I should make it clear at this point that I don't think any of this is literally true. There's no evidence for any of it. That said, it is really fun to think about it, and if you enjoy writing, it can be a fun way to make up characters. For instance, say you have someone who has all their planets in Taurus, so they have all the traits of that sign - patient, sensual, etc. But then they have just one planet - maybe Mars - in Scorpio. You end up with a loving, down-to-earth person with a cold and spiteful temper.
You can cast your own birth chart here if you want to have a look.
I don't know nearly as much about Chinese New Year signs. I know there's also an elemental aspect, which changes every twelve years. In other words, everyone born in my twelve-year 'cycle' is Earth. Dragons born in 2000 are Metal, while those born in 2012 are water.
Incidentally, this means Yuri was born in the year of the Earth Ox, while Alice Elliot was born in the year of the Water Snake. Karin is also an Earth Ox. You can look up your sign and element here.
Going back to blood. AB or O basically indicate extra 'bits' that can be in blood. 'O' blood has no bits in it. A blood has A bits, and B blood has B bits. AB has both A and B bits.
Bodies will attack the bits they don't recognise. So, if you give a transfusion of AB blood to an O person, their body would reject the blood because it would think the AB bits were a virus. That's why O blood is the universal donor - you can give O blood to anyone with any blood type, because there are no bits that look like viruses in there. People with AB blood are the universal recipient - they can have any kind of blood given to them.
Unfortunately, this means that people with O blood can only take donations of O blood. That's why other types of donors can still be useful. My A blood can go to anyone with A or AB blood, freeing up the O blood for someone who really needs it.
To complicate things further, positive or negative refers to the presence of rhesus particles, another bit that can be mistaken for a virus. Positive means you have them, negative means you don't. I'm A positive, so if I ever need a donation, my body won't attack blood with rhesus particles in it. It will attack blood with B bits.
This is where people with O negative blood get the short end of the stick again. They can't accept O positive blood, because, again, their body will think the rhesus bits are viruses and try to destroy them.
The more you know!
Shadow Hearts Covenant: Straw Millionaire Guide
The straw millionaire sidequest begins on the wall of Southampton. There, you will meet a man who gives you a piece of dried straw and suggests that you trade up. The following diagram indicates potential trades, which are further detailed in my (currently in-progress) item/sidequest no-spoilers guide.
The best prizes are the Nemesis Fan, which is an ultimate weapon, or 100,000 cash, if you don't want to use that character. It's also possible to end the quest with a good but incomparable prize, and those trades are marked in red. I highly suggest avoiding them. They will be marked with a warning in my guide.

The best prizes are the Nemesis Fan, which is an ultimate weapon, or 100,000 cash, if you don't want to use that character. It's also possible to end the quest with a good but incomparable prize, and those trades are marked in red. I highly suggest avoiding them. They will be marked with a warning in my guide.
Thursday, 6 March 2014
Shadow Hearts: Covenant - Spoiler-Free Item Guide Part 1, Apoina to Southampton
I enjoy finding my way through a game by myself, and I also hate not knowing I've found all the items and completed all the side-quests. This is the sort of guide I want to have.
Ring Soul
Character Abilities/Ultimate Weapons or Armour
Lottery Members
Crests
Apoina Tower
- Thera Leaf: Up small circular stairway, top right of first room.
- Talisman of Luck: Up small circular stairway, top right of first room.
- Mana Leaf: Second room, after stairs. Lower left.
- Hit Area Expand: Second room, after stairs. Top right.
Ring Soul: Attack Boost, automatic.
- Pure Leaf: Right of first pentagram.
- Tent: in corner near save point.
Domremy
- Mana Leaf: left path from entrance.
- Thera Leaf: second area, right path.
- Hit Area Expand: second area, leftmost path, near Newly Promoted Fafhrd.
- Talisman of Luck: in hut left of village entrance.
- Strike Expand: In village, right path after bridge.
- Tent: between houses on right.
- Thera Seed: left of Calm Hess.
- Pure Leaf: round the back of the houses, after the well.
Ardennes
Crests - Focalur, Andres, Furfur: automatic.
When you leave the camping area with the save point, take the first right.
- Thera Leaf: take every left path - you'll find it in a dead end.
- Soul Benediction: Hug the left wall from the Thera Leaf and you'll loop round to it.
From the Soul Benediction, back track to the last split and go right. You'll come to a bridge, with a save point just beyond it. Save, then go back to the camping area with the save point, take the first left.
- Mana Leaf: From the beginning of this area, go left.
- Barbatos: From the beginning of this area, go right then right.
- Battery: From beginning of this area, go right, then left, and it's an alcove along the path.
- Pure Leaf: at the start of the long grey path to the lift.
- Soul Benediction: Just before the lift, near the silver box on the wall.
Ride the lift to the top (you may have to try a few times).
- Tent: end of path near lift.
- Leather Cap: inside cave near lift.
Paris
- Nibelung Prelude: automatic.
- Mr Sommelier: automatic.
- Mr Matador: gained automatically only if you have a Shadow Hearts savefile on your memory card, or obtained later in Florence.
- Thera Leaf: Gepetto's office, Paris apartment.
- Crocell: main room, Paris apartment.
- Hit Area Expand: After exiting the train station, head right to the top of the stairs.
- Wolf Bout 1: automatic.
- Point Card: automatic.
- P-Defend Down 1: After exiting the subway station in Champs Elysses, run around to the left of the stairs.
- Thera Leaf: near street lamp.
- Haures: chest near savepoint in hotel.
- Tent: in Dr Gaultier's room.
Paris Tunnels
- Strike Expand: chest on right side, where tracks split into three.
- Shell Bracelet: on left side, where tracks split into three.
Take the leftmost path first.
- Pure Leaf: on the left, right before the path splits into two.
- Ring Soul: take the right path from the split and follow it all the way north.
- SP-Defend Down 1: take the left path just before where you met the Ring Soul. When you hit the path, it's in the southern dead end.
From the SP-Defend Down 1, go north to the save point, and flip the switch nearby. Then go back to the three paths and take the rightmost one this time. If you're interested, the middle path just joins onto the east-most side of the left path.
- Pocket Watch: when the right path splits into two, take the left path first. Then go back to the split and go right.
On the rightmost path, take the first left. When you can't go left any more, keep going north.
- Phoenix Tail: You'll find the Phoenix Tail in one of the northern dead ends along here, and a Talisman of Luck in another further west.
- Talisman of Luck: the north-west most deadend along this path.
Once you have those two items, go all the way right/east, until you can't go any further in that direction, then go north. Take the last left before the dead end, then go north..
- Amy: In the northern dead end, before taking a right for the exit.
Notre Dame
- Soul Benediction: near the entrance to the junk shop, south of the save point.
- Fuse: From junk shop owner.
Le Havre
- Seal of Force: left corner, near Gerard.
- Pure Leaf: side of house, down steps from Gerard.
- Ring Soul: most south-eastern corner of Le Havre.
- Thera Seed: chest north of Ring Soul.
- Lottery 16: automatic.
- Wool Coat: treasure chest in alleyway.
- Tent: left of treasure chest, end of alleyway.
- Hit Area Expand: Mayor's front garden, right side.
- Strike Expand: shed in Mayor's garden, left side.
- Star Brooch: shed in Mayor's garden, chest.
- Lottery Ticket: near head of bear rug, Mayor's house.
- Thera Leaf: top of stairs under portrait, Mayor's house.
- Mana Leaf: Behind the bar in the store.
Wine Cellar
- Seal of Wisdom: from the entrance, go forward hugging the left wall. The Seal of Wisdom is in a chest in the first big room full of junk.
- Bhodi Bracelet: go through the big room full of junk. It's in the second room of junk.
Keep hugging the left wall, until you come to another room of junk.
- Thera Seed: first room of junk.
- Silver Bracelet: second room of junk.
Keep hugging the left wall until you come to a save point. Turn around, and go back into the tunnels. Go right, round the corner, and right again (you're still hugging the left wall!).
- Mana Seed: first room of junk.
- Lottery Ticket: second room of junk.
Go back to the save point. After hitting all the switches, go through the door under the stairs.
- Pure Seed: first room of junk.
- Raum: second room of junk.
After the boss battle:
- Mr. Chef: beat Lucky Chest's minigame in room where Bhodi Bracelet was.
- Wolf Bout 2: Where you fought the boss (hint: pocket watch).
Le Havre
- Solomon's Key: in shop, after wine cellar. You can complete the first area immediately.
Port of Southampton
- Hit Area Expand: chest in pub.
- Mr. Detective: chest upstairs in pub.
- Lottery Ticket: northeast corner of main square.
- Lottery 15: northeast corner of main square.
- Leonardo's Bear: top of stairs, to the right.
- Nibelung Scene 4: man in square.
- Strike Expand: statue, main square.
- Dried Straw: top of wall, from Straw Merchant. Start of Straw Millionaire sidequest.
- Seal of Aura: chest near wrestling ring.
- Locker: near wrestling ring.
- Fight Great Gama in Wrestling Ring (hint: Leonardo's Bear).
Part 2
Ring Soul
Character Abilities/Ultimate Weapons or Armour
Lottery Members
Crests
Apoina Tower
- Thera Leaf: Up small circular stairway, top right of first room.
- Talisman of Luck: Up small circular stairway, top right of first room.
- Mana Leaf: Second room, after stairs. Lower left.
- Hit Area Expand: Second room, after stairs. Top right.
Ring Soul: Attack Boost, automatic.
- Pure Leaf: Right of first pentagram.
- Tent: in corner near save point.
Domremy
 |
| Domremy |
- Mana Leaf: left path from entrance.
- Thera Leaf: second area, right path.
- Hit Area Expand: second area, leftmost path, near Newly Promoted Fafhrd.
- Talisman of Luck: in hut left of village entrance.
- Strike Expand: In village, right path after bridge.
- Tent: between houses on right.
- Thera Seed: left of Calm Hess.
- Pure Leaf: round the back of the houses, after the well.
Ardennes
Crests - Focalur, Andres, Furfur: automatic.
When you leave the camping area with the save point, take the first right.
- Thera Leaf: take every left path - you'll find it in a dead end.
- Soul Benediction: Hug the left wall from the Thera Leaf and you'll loop round to it.
From the Soul Benediction, back track to the last split and go right. You'll come to a bridge, with a save point just beyond it. Save, then go back to the camping area with the save point, take the first left.
- Mana Leaf: From the beginning of this area, go left.
- Barbatos: From the beginning of this area, go right then right.
- Battery: From beginning of this area, go right, then left, and it's an alcove along the path.
- Pure Leaf: at the start of the long grey path to the lift.
- Soul Benediction: Just before the lift, near the silver box on the wall.
Ride the lift to the top (you may have to try a few times).
- Tent: end of path near lift.
- Leather Cap: inside cave near lift.
Paris
- Nibelung Prelude: automatic.
- Mr Sommelier: automatic.
- Mr Matador: gained automatically only if you have a Shadow Hearts savefile on your memory card, or obtained later in Florence.
 |
| Champs-Elysees |
- Crocell: main room, Paris apartment.
- Hit Area Expand: After exiting the train station, head right to the top of the stairs.
- Wolf Bout 1: automatic.
- Point Card: automatic.
- P-Defend Down 1: After exiting the subway station in Champs Elysses, run around to the left of the stairs.
- Thera Leaf: near street lamp.
- Haures: chest near savepoint in hotel.
- Tent: in Dr Gaultier's room.
Paris Tunnels
- Strike Expand: chest on right side, where tracks split into three.
- Shell Bracelet: on left side, where tracks split into three.
Take the leftmost path first.
- Pure Leaf: on the left, right before the path splits into two.
- Ring Soul: take the right path from the split and follow it all the way north.
- SP-Defend Down 1: take the left path just before where you met the Ring Soul. When you hit the path, it's in the southern dead end.
From the SP-Defend Down 1, go north to the save point, and flip the switch nearby. Then go back to the three paths and take the rightmost one this time. If you're interested, the middle path just joins onto the east-most side of the left path.
- Pocket Watch: when the right path splits into two, take the left path first. Then go back to the split and go right.
On the rightmost path, take the first left. When you can't go left any more, keep going north.
- Phoenix Tail: You'll find the Phoenix Tail in one of the northern dead ends along here, and a Talisman of Luck in another further west.
- Talisman of Luck: the north-west most deadend along this path.
Once you have those two items, go all the way right/east, until you can't go any further in that direction, then go north. Take the last left before the dead end, then go north..
- Amy: In the northern dead end, before taking a right for the exit.
Notre Dame
- Soul Benediction: near the entrance to the junk shop, south of the save point.
- Fuse: From junk shop owner.
Le Havre
 |
| Camille Pissarro's painting of Le Havre harbour, 1903. |
- Seal of Force: left corner, near Gerard.
- Pure Leaf: side of house, down steps from Gerard.
- Ring Soul: most south-eastern corner of Le Havre.
- Thera Seed: chest north of Ring Soul.
- Lottery 16: automatic.
- Wool Coat: treasure chest in alleyway.
- Tent: left of treasure chest, end of alleyway.
- Hit Area Expand: Mayor's front garden, right side.
- Strike Expand: shed in Mayor's garden, left side.
- Star Brooch: shed in Mayor's garden, chest.
- Lottery Ticket: near head of bear rug, Mayor's house.
- Thera Leaf: top of stairs under portrait, Mayor's house.
- Mana Leaf: Behind the bar in the store.
 |
| Le Havre today - it was heavily rebuilt after the war. |
Wine Cellar
- Seal of Wisdom: from the entrance, go forward hugging the left wall. The Seal of Wisdom is in a chest in the first big room full of junk.
- Bhodi Bracelet: go through the big room full of junk. It's in the second room of junk.
Keep hugging the left wall, until you come to another room of junk.
- Thera Seed: first room of junk.
- Silver Bracelet: second room of junk.
Keep hugging the left wall until you come to a save point. Turn around, and go back into the tunnels. Go right, round the corner, and right again (you're still hugging the left wall!).
- Mana Seed: first room of junk.
- Lottery Ticket: second room of junk.
Go back to the save point. After hitting all the switches, go through the door under the stairs.
- Pure Seed: first room of junk.
- Raum: second room of junk.
After the boss battle:
- Mr. Chef: beat Lucky Chest's minigame in room where Bhodi Bracelet was.
- Wolf Bout 2: Where you fought the boss (hint: pocket watch).
Le Havre
- Solomon's Key: in shop, after wine cellar. You can complete the first area immediately.
Port of Southampton
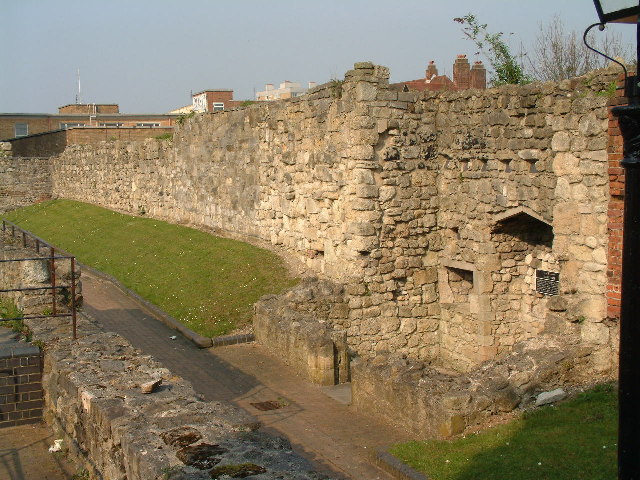 |
| Southampton Wall Today |
- Mr. Detective: chest upstairs in pub.
- Lottery Ticket: northeast corner of main square.
- Lottery 15: northeast corner of main square.
- Leonardo's Bear: top of stairs, to the right.
- Nibelung Scene 4: man in square.
- Strike Expand: statue, main square.
- Dried Straw: top of wall, from Straw Merchant. Start of Straw Millionaire sidequest.
- Seal of Aura: chest near wrestling ring.
- Locker: near wrestling ring.
- Fight Great Gama in Wrestling Ring (hint: Leonardo's Bear).
Part 2
Thursday, 27 February 2014
Walking Over Alice's Grave - Part 3
God Gave Us Our Memories
So We Might Have Roses in Winter.
J. M. Barrie
Because of the war, transport
was difficult. It was a journey of
almost two months to reach Shanghai, and I had spent so much time already doing
nothing. In Domremy, I had tended the
church. I had befriended a lonely young
girl, Jeanne, and her pet wolf, Blanca.
I spent many hours simply staring at the sky. It had taken so much
effort, to move, to think, even to breath.
Then the war began, and there
were things to do again. Not much; we faced only thieves, who hoped,
presumptuously, that the war would leave us undefended. I would not have left Domremy if there had
been anything worse attacking us. My
holy powers had grown throughout my journey with Yuri. The townsfolk and I were a match for any who
sought to take advantage of us.
This war must be what Albert
Simon meant, when he said that the world had a terrible fate awaiting. I wonder more and more often these days if we
made the right decision, defeating him. Perhaps his way was better? But, no. I must be firm. I did not wash up
here on the tides of fate. I am here because of the decisions we all made. Life
may have infinite possibilities, but that only means my decisions and actions
matter all the more. I chose to resist the use Albert Simon had for me, in
changing the fate of the world. I must
now deal with the world as it is.
The
first thing I did once in Shanghai was to head to the hotel to rest. It took me a long time to fall asleep. This was the same hotel that Yuri, Zhuzhen,
Margarete and I had stayed in soon after we’d all met for the first time. I had struggled to sleep; a few nights
earlier, I’d been cursed by Li Li, and to this day, I find myself waking from
nightmares. I dreamt I was drowning,
like Li Li had, and had awoke gasping for air.
Not wanting to wake Margarete, I had walked out into the hallway. Yuri was there. We spent hours talking about ourselves that
night, mostly about our fathers. That
was what Yuri, Li Li and I all had in common – the death of our fathers. That was the first time I ever saw Yuri
vulnerable. Remembering it now makes my
heart ache, and I cried myself to sleep.
The
next day, I headed to Zhen’s bar. Zhen
had trained both Yuri and his father in combat, by summing monsters for them to
battle. I’d watched, almost two years
ago now, as Yuri had proved himself worthy, in Zhen’s eyes. Zhen had given Yuri a crucifix, one that he
said came from Yuri’s mother. That was
the crucifix Yuri gave to me, and which I had left hanging on his gravestone.
Zhen’s
daughter, Quihua, didn’t recognize me at all.
When I told her I wanted to take part in the pit fights, she was amazed,
and fetched her father immediately. He
bustled out of the backroom, a worried expression on his face.
“Who
are you?” He demanded, “and how do you know about the pit fights?”
So, he hadn't recognised me
either! I smiled at him. "Let me try them," I said. "Then I'll
tell you.”
"You're not with the
imperial army, are you?" he asked, seeming both surprised and suspicious
of me.
"No."
I knew why he was worried. With
the war getting worse, Zhen was afraid that he would be forced to enlist, maybe
even forced to use his monsters as weapons in the war.
He shrugged. Perhaps he was thinking that, even if I were
an imperial spy, I wouldn’t last more than a few rounds against his monsters.
After a minute’s further thought
he nodded at me. "Come through
here, then."
I went through the door he had
indicated. As I walked passed Quihua she grabbed my arm, and whispered
hurriedly, "You don't have to do this!"
"I'll be fine."
"We can't guarantee your
safety!"
Zhuzhen was sitting in the pit
fight room. That made life easier; I’d expected to ask Zhen where he was after
beating the monsters.
"Who's this, Zhen?" Zhuzhen
asked, not recognizing me at first. I smiled at him, and a look of puzzled
realization crossed his face.
"She insists on trying the
pit fights,” Zhen answered. “She says
she'll tell us who she is afterwards."
Zhuzhen's face cleared.
"Ah," he said. "I see."
I stepped on to the platform.
Zhen stood in front of me. "Are you ready?"
I nodded my assent.
Zhen threw a few of his weaker monsters
at me first, testing the waters. I dispatched them easily. When he saw that they weren’t causing me any
trouble, he tried summoning a wind shear.
Nasty, vicious little creatures.
I focused my most powerful magic on it, the spell I thought of as
advent, and it was down.
From then on, Zhen threw his
strongest monsters at me. None of them challenged me.
The final enemy Zhen summoned
was Tindalos, and that made me think. We
had fought Tindalos in Bistritz; it was the monstrous form of Kevin, the mayor
who had tried to steal Nina’s wheat seeds, believing them to be gold dust. Kevin was dead; we’d killed him. And yet, here he was. In a strange and twisted way, he’d been
resurrected.
I dispatched Tindalos, having
barely broken a sweat. Zhen stared at
me. "Who are you?" He asked, finally.
From behind me, Zhuzhen asked
"Haven't you guessed?"
Zhen and Quihua stared at me. I
smiled back.
"It can't be…Alice?"
Quihua gasped.
I nodded, and Quihua hugged me,
knocking the breath out of me. "Alice!"
"Alice?" Said Zhen,
still staring at me in disbelief. "Alice Elliot?"
"Alice Hyuga,” I corrected
him. Over Quihua’s shoulder, I saw
Zhuzhen smile.
When Quihua had finally had
enough of hearing about Europe and Domremy, and commiserating over Yuri,
Zhuzhen and I excused ourselves.
“Alice Hyuga,” he said
thoughtfully, as we walked back to the inn.
"I can't say I'm surprised. He told me once that he would marry you as
soon as it was all over."
"I didn't know that,"
I confessed. "I was concerned that he might object."
Sometimes, in my darkest
moments, I’d convinced myself that Yuri had never loved me as I loved him. Then I felt ashamed of myself for doubting
him.
"Yuri loved you,” Zhuzhen
reassured me. I blinked away a wash of
tears at his use of the past tense.
Desperate to change the subject, I asked what he’d been up to.
A few hours later, over a meal
in the inn, we’d finally caught up with each other. It was only then, as darkness crept over
Shanghai, that I finally got up the courage to ask him what I’d travelled
nearly six thousand miles to ask. If
he’d help me to raise the dead; to bring Yuri back.
Zhuzhen sat in silence for a
long time once I’d said it. I knew what
I was asking him. Koudelka had told me
what Patrick did to raise Elaine. I’d
seen myself how many people Jack had slaughtered to try to raise his
mother. I could only hope that the
combined powers of Zhuzhen and I would be enough without the enhancements of
murderous black magic.
"I'm not going to stop you," he said
finally. I was grateful. It wasn’t an
offer to help, but it was a start.
"I had a thought about
Zhen's pit monsters…"
"No!” Zhuzhen said, suddenly, harshly. Then, more softly “He only summons a memory
of creatures he, or those he knows have fought. If he brought any form of Yuri back, it would
only be a copy of the Yuri we fought in Bistritz."
“As
long as it’s Yuri, I don’t care what state he’s in!"
He shook his head, sadly. "It wouldn’t be Yuri, Alice. It would be a monster in a body that looked
like Yuri's."
I teared up again.
I’d known it was a stupid idea, but still, I’d dared to hope it could
really be that easy
.
We sat silently for a while
longer.
"…have you asked Roger for
the émigré…?” Zhuzhen asked. He seemed
almost afraid of my answer.
"I’m leaving the émigré as
a last resort,” I said. “I don’t want to
sacrifice anyone. Before I do anything
like that, I want to speak to Yuri, to ask what he wants me to do.”
"I see.”
"We both know souls with
regrets stay on this plane, as ghosts.
If Yuri were…if Yuri had regrets, I thought he might be near his
parent’s graves. I thought you might
know where they were.”
Zhuzhen thought for a
moment. "I know Ben didn’t have
one,” he said, thinking out loud.
"Ben?"
"Yuri’s father, Jinpachiro.
Ben was his nickname,"
"Ah. I didn’t think he
would. What about Anne? She'd be buried in the village where she died, wouldn't
she?"
“If she were buried. She was torn apart by her possessed
neighbours.”
"I remember Yuri telling
me. The first time he used his fusion
powers was to tear them apart.”
Yuri had spent the night alone,
hugging his mother’s dead body to him.
My eyes filled with tears again as I thought of that small child, and of
the man he grew into, but I tried to hold them back. Then I remembered him playing with a puppy in
Fengtian, and I couldn’t hold back any longer.
Zhuzhen hugged me and murmured
soothing noises. "There, there,"
I gulped. "Zhuzhen, what if
I'm doing the wrong thing trying to bring him back? Maybe he’s happy in heaven
with his parents."
"The kid was too young to
die, Alice,” Zhuzhen said, surprising me with how strongly he seemed to feel
about it. “He was taken from us. He should have lived a long and happy life;
he deserved to. And if we can, I want
him back too.”
When I’d sobbed enough, and was
able to talk, I said "My uncle Geppeto keeps telling me to keep my chin
up, that I'll find someone else, that I'm still young. He doesn't seem to
realise that that's not the point. I don't just want a man, or someone to love,
I want Yuri!"
"I know, Alice, I know.
Geppeto never saw you two together, did he?"
I shook my head.
"Well, anyone who did would
realise that you were – are – meant to be together. Some people are.”
I nodded. I
couldn’t speak.
"In my experience, there
are some loves you can get over and some that you can’t. I don’t think Yuri would have survived
without you. I don’t know if you can
survive without him, but I know you’ll never move on unless you do everything
you can to bring him back.”
" If I'd never known Yuri,”
I began, hesitantly, “I could have had an ordinary fairly happy life. I could
have married, had children, grown old and died.
It wouldn’t have been a bad life.”
I brushed tears from my eyes,
and continued. “But with Yuri, I was
so…fantastically happy. Even when we were fighting for our lives, I could be
happy as long as we were together. And, to me, one minute of that is worth a
million of those lives I could have had.”
I sniffed. "And now…I can't go back! I can't be happy with 'happy
enough'! Oh, god, I just want Yuri back.
I’d give anything to have Yuri back!"
"I know, Alice."
Zhuzhen said, sympathetically.
"I'm sorry, I didn't mean
to break down like that." I wiped my tears away with my hand, and stood
up, looking through the drawers of the hotel room for a tissue.
"I was in love like you
once.”
"You were?” I ask, and then
I’m embarrassed at myself for sounding surprised. Zhuzhen doesn’t notice; he is lost in
thought.
"Yes. We were…very young. I'd have been fourteen or so. I grew up in a small village, and everyone
expected me to marry the girl next door. She was the only girl close to my age within
fifty miles. She wasn’t a bad girl; she
was my happy enough.”
I watch Zhuzhen. He is lost to me, staring back over the years
to a past I never suspected.
“A circus came to our village. There was an acrobat, a girl my age. I loved her the moment I saw her. That night I
waited outside the circus tent, just to meet her, to speak with her. We spent a
week or two like that, meeting at night.
When she told me that she felt the same way about me as I did about her,
it was the single happiest moment of my life."
"What happened?"
"We agreed to run away
together; she wanted to escape the circus, and I was ashamed to let down my
family. The night we were supposed to
leave…” He trails off, his face bleak.
"What happened?"
"A monster attacked the
circus in the night, they said. Killed her."
I gasped, “oh, Zhuzhen!” I
couldn't think of any words good enough to express my sorrow.
"I went to see the circus
owner. I decided that if I couldn't have her, I would join the circus, travel
with the people she had known. But when the circus owner realized that I was
the boy she’d planned to run away with, he told me that he was the one who had
killed her."
"Oh, how horrible!"
"He told me it was my
fault; if she hadn’t tried to leave, he would never have had to kill her. He was insane; he pulled out a sword and
tried to kill me.”
"So what did you do?"
"That was the first time I
ever used magic; I didn’t know I could until that day. I killed him. I couldn’t stay. I ransacked his rooms, stole all his
valuables, and then stole his horse. Picked a direction and started moving. I
was halfway to Shanghai before I could gather my wits about me. Then I slid off
the horse and cried. Finally I picked myself up, and rode the rest of the way
to Shanghai."
Neither of us speak for a
moment. “I never went home,” Zhuzhen
finishes, finally. “I couldn’t. I couldn’t face my family, and I couldn’t
bear to go back to the place where she’d died.
I still have her scarf.”
He
shows me; the scarf is knotted around his waist, hidden under his tunic.
"What was her name?" I
ask.
"Abasea. She was Italian. A
little younger than me, slightly shorter, dark hair, olive skin, and the most
beautiful eyes you've ever seen. She had a little beauty spot, just
there," he said, indicating a place high on his left cheekbone. "She
had a waist I could put my hands around, and she looked half-starved, but
nonetheless, she was the most beautiful creature in existence. All I wanted to
do was pick her up and hide her away from the world, keep her safe and
protected. She had a slight accent, and she didn't speak Chinese at all well,
but we understood each other well enough. Her favourite food was apples."
"You still remember…"
I said wonderingly.
"Yes," he said,
"And I would have revived her in a heartbeat, if I‘d ever thought it was
possible.” He sighed. "I shall be
seeing her soon anyway,"
"Zhuzhen!"
He waved a hand dismissively.
"I'm getting old, Alice. I shall be glad to go."
"Zhuzhen…"
"Alice…Whenever we reached
a new town, and Yuri and I went looking for better armour or stronger weapons,
Yuri would always look for something to protect you, first. If it was a choice between himself or you, he
would always choose you."
"I never knew."
"I don't think he knew
himself. He did it automatically. If I'd pointed it out he wouldn't have
believed it, would have said it was coincidence, but it wasn't…"
We were silent again. This conversation was not an easy one.
"Thank you," I said
eventually.
“I
don’t know where Yuri grew up,” Zhuzhen told me. “I’m sorry.
I don’t know where Anne died.”
"It's all right.” I said.
"Can you think of anywhere else we could try?"
"Have you asked Koudelka? She’s much more powerful than I am, and she’s
channeled the spirits of the dead before."
"I don't want to disturb
her. Besides, Koudelka has her ways of
contacting me – she’d tell me if she knew anything." I sighed. "He's
not at his grave; I would have sensed him. He's not where he died, either."
"Are you sure?"
"I've caught that train
again a few times. I know it's the same one. I checked every carriage. I checked
the stations we went through."
I
hadn’t known the exact moment of Yuri’s death.
I’d stopped at every station and searched for him, because I knew he
could have died anywhere along the route, while I was sleeping in his arms.
"Last time Margarite was
here, she told me about the Fort of Regrets – have you heard of it?"
"The Fort of Regrets? No,
where is it?"
"It's on Isle St. Marguerite,
just off the coast of Cannes. It's said to be where the dead who have regrets
go."
"It’s worth a try,” I said,
trying to sound optimistic.
"Until we think of
something else,” Zhuzen said. “Speaking
of Margarite, are you going to ask her to go with you too?"
"Too? You're coming?"
"Of course! I could never
pass up an opportunity like this!"
"Oh Zhuzhen, thank you,” I
say. I knew he’d loved Yuri in his own way, but I’d hardly dared hope that he’d
help me. “Yes, I did want Margarite's
help, but I have no idea where she is."
He blinked at me in surprised. "I thought you
knew."
"Knew what?"
"She's here!"
Tuesday, 25 February 2014
Future Learn: Begin Programming Your First Android Game
Future Learn are running a course from the University of Reading on programming an Android game. It's a seven week course, which they estimate will take about three hours of your time a week, and it started yesterday, so if you start now, you won't need to catch up.
Week one is mostly about downloading the android emulator, so you can program on a laptop. Tip; unzip the ADK using 7-zip, especially if it asks you for a password. It doesn't need a password, but the default windows unzipper can't handle files with titles that long, or something like that. Either way, unzipping with 7-zip got rid of all my error messages.
As far as I can tell, the basic format of the course is; they give you the barebones code of the game, then show you how to modify it, thereby teaching you what each bit does. It's all in java. I'm mostly focused on learning Python, but you can't really help learning a bit of java along the way, whichever language you focus on.
You don't need to own an android device or have any prior knowledge of programming at all. You do need to have some computer skills in the sense of googling error messages and hoping, or at least, that's what I've had to use so far in unzipping that damn ADK.
I'll give you more updates as I get further into it, or you can click on the link and go see for yourself.
Subscribe to:
Comments (Atom)