Pages

Tags

.hack// series (14) .hack//Infection (6) .hack//mutation (6) .hack//outbreak (7) .hack//quarantine (5) 1bitHeart (4) A Bird Story (1) A Mortician's Tale (1) Ability Up (11) About Love Hate and the Other Ones (1) Achievements (4) Ahriman's Prophecy (1) Aladdin (1) Alice Elliot (6) Alicemare (1) Alphadia Genesis (5) Amnesia: Memories (1) An Octave Higher (2) Analogue: A Hate Story (1) Anodyne (4) Artefact (2) Artefact Adventure (1) Aveyond (2) BAD END (2) Bad Service (1) Before I Forget (1) Best Armour (16) Best Weapons (26) Bestiary (1) Beyd (1) Bioshock Infinite (1) Black Home (1) Blitzball (1) Blush Blush (1) Boss Fight (1) Boyfriend Dungeon (1) Boyfriend Maker/Boyfriend Plus (1) Braid (8) Breath of Fire (24) Breath of Fire II (18) Breath of Fire III (37) Breath of Fire IV (25) Breath of Fire Series (10) Breath of Fire: Dragon Quarter (4) Brothers (1) Casper (1) Cave Story (1) Celestian Tales: Old North (2) Cheat Engine (1) Cheats (1) Cinderella Phenomenon (3) Coffee Talk (1) Collectibles (11) competition (1) Completion Project (21) Confines of the Crown (1) Cozy Grove (1) crafts (1) Crash Bandicoot 2 (2) Croc: Legend of the Gobbos (2) Crush Crush (1) Crystal Story (2) Crystalline (1) Cubicle Quest (1) Dark Parables (5) Death Stranding (1) Deis (2) Deponia (1) Dèsirè (2) Dice (1) Discworld (1) Disgaea (1) Dreamworld (1) eBay (1) Ehrgeiz (3) Epic Battle Fantasy III (1) Equipment (3) eReader (1) Eternal Senia (1) Fairy Village (1) Fanfiction (8) Final Fantasy (4) Final Fantasy II (2) Final Fantasy IV (3) Final Fantasy IX (7) Final Fantasy Series (5) Final Fantasy Tactics (1) Final Fantasy V (1) Final Fantasy VII (7) Final Fantasy VIII (10) Final Fantasy X (7) Final Fantasy X-2 (4) Final Fantasy: Crystal Chronicles (3) Fishing (11) Forget Me Not My Organic Garden (1) Freeware (8) Frontierville (1) Future Learn (1) Game (1) Game-Design (1) Ghost on the Shore (1) Ghost Trick (1) Giving Up (1) God Only Knows (1) Gone Home (1) Grunty (1) Guide (95) GymPact (1) Habitica (3) HabitRPG (3) Harry Potter and the Philosopher's Stone (1) Hellblade: Senua's Sacrifice (1) Hex Manipulation (1) Hitman GO (1) Horizon Zero Dawn (2) HuniePop (1) I Love You Colonel Sanders! (1) Idle Evolution (2) Imposter Factory (1) incentive (4) Incomplete (7) Interpretation (11) iOS (1) IRL (4) Justice for All (1) Kobo (2) Kongregate (1) Koudelka (2) Labyrinthine Dreams (1) Lake of Voices (1) Later Alligator (3) Legacy Challenge (53) Level Grinding (3) Liar (1) Little Goody Two Shoes (1) Littlewood (1) Long Live the Queen (2) Lord of Twilight (1) Lost Phone Series (1) Manillo (2) Marie's Room (1) Masters (9) Memento (1) Minami Lane (1) Mini-Game (5) missed messages (1) Mobile (1) Monster Camp (1) Monster Magic (3) Monster Prom (4) Murder by Numbers (1) My Time at Portia (1) Nina Wyndia (2) Nintendo DS (1) No Case Should Remain Unsolved (1) non-gaming (3) Notes (20) Octopath Traveler (2) Official Guides (1) Online Courses (1) Pacman World (1) Pact (1) Paradise Killer (2) PC Building (1) Persona 4 (4) Pheonix Wright Ace Attorney (1) Phoenix Wright (7) Pikmin Bloom (1) Plague Inc (1) Playing All My Steam Games (5) Pokemon (1) Princess Maker 2 (4) Princess Maker Series (3) Programming (1) Project Zero (2) PSYCHO-PASS Mandatory Happiness (3) Quick Overview (2) Rant (2) Rebuild (1) Recettear (1) Review (14) Science Girls! (1) sewing (1) Shadow Hearts (3) Shadow Hearts Series (8) Shadow Hearts: Covenant (17) Shadows and Lies (1) Shopping List (5) Sidequest (12) Sims 3 (53) Skyrim (1) Solomon's Club (1) Speed Dating for Ghosts (1) Speed Run (1) Spiderman (2) Spring of Myst (1) Spyro (2) Star Ocean: Til the End of Time (2) Stardew Valley (1) Stat-Raising (6) Steam (2) Stories Untold (1) Storyline (7) Street Fighter (1) Super Mario World (1) Tailor Tales (1) Tales of Symphonia (2) Tarkov (3) Tarzan (1) The 11th Hour (1) The 13th Doll (1) The 39 Steps (1) The 7th Guest (1) The Banner Saga (5) The Crooked Man (2) The King's Request (1) The Novelist (1) The Path (1) The Quiet Man (1) The Sacred Tears TRUE (1) The Sexy Brutale (2) The Sims (54) The Suicide of Rachel Foster (2) the white chamber (1) The Yawhg (1) Theory (1) Thunderhawk (3) Tigger's Honey Hunt (1) Tips (1) To Be or Not to Be (1) To the Moon (1) Trivia (21) Turing Test (1) Unlimited Cash (4) Vampire Survivors (1) Vandal Hearts II (4) Visual Novel (1) Walking Over Alice's Grave (4) Women in Games (3) Work-in-Progress (4) X-Men: Mutant Academy 2 (1) Xenosaga (1) Yuna (3) Yuri Hyuga (8) Zero Escape (2) Zodiac Challenge (53)

Wednesday 22 December 2021

Pikmin Bloom

Pikmin Bloom is a mobile game from Niantic and Nintendo, the same companies that make Pokemon Go.


Walking

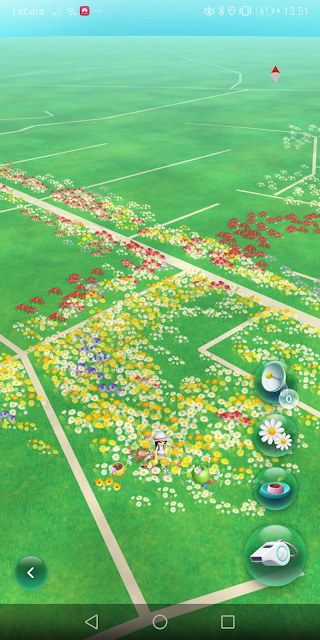
In Pikmin Bloom, the Pikmin walking with you find more Pikmin seedlings and Pikmin food (fruits). You can then put the seedlings in your backpack, and walk to grow them into more Pikmin to join your squad. The steps also contribute towards levelling your character up, and levels unlock things like more types of Pikmin, the ability to have more Pikmin actively walking with you, and the ability to send more Pikmin on expeditions. This article has a list of level requirements and rewards. I'm currently on level 29, so I'll keep track of the data for the next 30 levels. You can plant flowers as you walk, which makes the map pretty and makes your steps go further in growing your seedlings while you've actively walking and planting. There are big flowers around the world which bloom when enough little flowers (from everyone) are planted around them. I don't care much about these.


The game has encouraged me to walk more. For example, right now, I'm about 5000 steps from the next level, and I have a few Pikmin seedlings I want to grow. I'm considering going on a 20 minute walk (about 2000 steps) because 20 minutes really isn't very long but it'll hatch a few Pikmin and get me a good way towards that next level. This happens a lot, squeezing in little walks to just get to the next small goal.


Pikmin and Affection

There are seven types of Pikmin, all of which are unlocked by level 19. They are Red, Yellow, Blue, White, Purple, Rock, and Winged.


Your Pikmin gain affection from being fed nectar from fruit, and from being sent on expeditions. There might also be other ways I don't know about. Their affection level is represented by hearts. When they reach four hearts, which is the maximum, they gain a special expedition. That Pikmin will return to the place of their birth (hope you didn't get on a flight since then) and pick up a present. That present will be an accessory, also called 'décor'. The specific type of décor depends on the environment where the Pikmin was born (hatched? seeded?), which I'll discuss more below.


You're allowed to name your Pikmin, no one can stop you. I have nearly 200 and have now begun naming them random collections of syllables.


Squad


Your 'squad' are the Pikmin who are actively walking with you. They collect fruit and seedlings while you walk. I'm not sure if there are any other benefits. I've not noticed Pikmin gaining affection from walking with me, which is a little bit insulting. The number of Pikmin you can have walking with you increases as you level up.

The Squad


Your squad are the specific Pikmin you can feed with nectar. When you feed them, you can pluck flower petals from them and these are the petals that you can plant as flowers when walking.

Honestly, I'm not really sure what the game wants me to do with my squad. What I want to do with my squad is use it to keep tabs on specific Pikmin, those whose affection I'm focused on increasing. That's mostly either those whose décor I don't have yet (discussed below), or those which are close to 4 hearts but not yet at the maximum level. However, the game keeps putting random Pikmin in my squad so every time I want to feed them, I have to take everyone out of my squad and then put specific Pikmin back in. I can't even tell the game to empty my squad, I have to select all but one (because my squad can't be empty), remove them, and then select the ones I want. To get to the ones that are nearly at 4 hearts, I need to sort my Pikmin by affection levels and then scroll past all of the ones that are at 4 hearts. This is really annoying. The décor ones are a bit easier to find, because I can favourite them, but it's still annoying to have to keep putting them back in. What does the game think I want to favourite them for, if not to focus on increasing their affection?

When I say the game puts random Pikmin in my squad, I don't think it is random. I think, if you have any empty slots - like if you've sent some Pikmin out on an expedition, which I do often because I'm trying to raise their affection - then any Pikmin returning from expeditions or newly hatched Pikmin will automatically go into your squad. Since expeditions include challenges (below), which 4-heart Pikmin are best suited for, 4-heart Pikmin end up back in my squad a lot. I don't want them there. I don't want to give them more nectar when there are other Pikmin to feed who can benefit more from it. I assume the game designers had something in mind when they designed this, some idea about what they thought players would want to do. I cannot figure out what it is.


Expeditions

To view expeditions, you can click on the banner at the top of the main screen. Alternatively, click on the big square showing your step count and you'll open a menu containing your Lifelog, Pikmin, Seedlings, Expeditions, and Postcards on different tabs.


There are two types of expeditions. The first kind are giant mushrooms, which you can send teams of Pikmins to attack. It's these expeditions which you can send more and more Pikmin to as you level up, and it's these expeditions on which you can earn stars. Each Pikmin you send adds to the damage you do, which, in turn, speeds up how long it takes them to destroy the mushroom. This then contributes to your star rating, which is out of three. The damage Pikmin can do is increased by their affection level, whether they have an accessory or not, and their colour. Red Pikmin do more damage against red mushrooms, blue against blue, and so on. Purple are stronger than other Pikmin, so they're generally good if you don't have more specific Pikmin. There may well be other factors that I haven't figured out yet.


I live in a small village, and while I can see there is at least one other player - because there were already flowers on some streets around here before I started planting them - I don't think they're very active. This means that, even though up to 5 people can join any challenge, I've only ever played them by myself. Even so, this is still rewarding. On the very smallest mushrooms, I've been able to get 3 stars, once my levels were in the high 20s and I had multiple high affection Pikmin to send. You can't actually fail these challenges, they'll just take longer the weaker you are.


The other type of expedition is when your Pikmin spot a seedling or piece of fruit nearby, while you're out walking. You can send some of them out to fetch it later. This is a benefit over Pokémon Go, because you don't have to get your phone out while you're walking, you can sort it out when you get home. How long the expedition takes depends on which/how many Pikmin you send and how far away it is. One beta tester has reported getting on a flight and having his faithful Pikmin take 40 days to walk back from their expedition. Most expeditions won't take that long. Pikmin walk faster than you, and they'll be heading to places you've walked past.


There's a scanner you can use once per day (main page, click on the map icon at the bottom and then it's at the top of the four options on the right) to find nearby expeditions.


Décor & Environments


Décor are accessories your Pikmin wear. They'll gain them immediately, if grown from a giant seedling, or they'll gain one once they reach the maximum affection level. The type of décor a Pikmin will gain depends on where you originally found their seedling, that is, what kind of environment. The potential environments a Pikmin can be found in are as follows;


  • Restaurant
  • Café
  • Sweetshop
  • Movie Theatre
  • Pharmacy
  • Zoo
  • Forest
  • Waterside
  • Post-Office
  • Art Gallery
  • Airport
  • Station
  • Beach
  • Hamburger Shop
  • Mini-Mart
  • Supermarket
  • Bakery
  • Hair Salon
  • Clothing Store
  • Park
  • Roadside

As far as I can tell, every part of the world is assigned to one of these environments. The default seems to be roadside, and then the other kinds are assigned based on what is nearby. The map does seem to play a little fast and loose with this. Forests, for example, seem to be any kind of farmland, or greenspaces which aren't parks. That's handy - how many of us actually live near a forest? On the other hand, the area right outside my local railway station seems to only sometimes identify as a station. Maybe it's just GPS wobbles.

You can view your décor collection by going to your character page from the main screen and then clicking on your décor badge at the bottom. This lists all of the potential décor, showing you the symbols used for each environment.  You'll get this as soon as you get a piece of decor, which will be when you first grow a Pikmin from a giant seedling or when you first raise a Pikmin to 4 hearts and send them to fetch their present, whichever comes first.

The relevant symbol will also appear on your Pikmin or seedling, and it appears on your scanner, so you know what kind of environment you're in. That means you can look at which décor you're missing and then go and try to hunt down that specific kind of Pikmin, either by walking around that environment a lot, or by going to one area you know of that counts and using your scanner.


There are at least seven types of décor for each category, one for each type of Pikmin. The forest and supermarket categories have fourteen types, two for each type of Pikmin. I don't know if you get a random one of the two, or if you have to find two different types of forest and supermarket in order to get all the décor.

As of December 21st, there's a special type of décor to collect. Roadside Pikmin collected between then and January 11th (23:59 JST, so, in practical terms, the 10th) will have special Christmas stickers, instead of their normal roadside stickers. I won't be surprised if the game does this kind of event for every major holiday.

Honestly, I think collecting the various kinds of décor will be what gives the game long-term appeal for me. I literally went out this morning and did a little explore around my area to see if there were waterside and forest environments within reach. It turns out that there are, along a nice little walk down the river which I hadn't discovered before. 

Diary

Every evening, the Pikmin will ask how your day went and they'll pick out a photo you've taken that day that you might want to save. They only pick one, and I don't think there's a way to choose an alternative, you just accept or reject that one. I think I'd like it better if 3 or so Pikmin chose a photo, and I got to pick out of the 3. Maybe the Pikmin whose choice I approve could even gain a little bit of affection, that would be nice.

The diary feature is cute, but not essential for me. It annoys me that it goes off automatically at 9pm, because sometimes I open the app because I'm planning to go for a walk around then and I just want to start planting flowers before I set off. But instead of doing that, I have to quickly click through the diary thing and rush through all the options. If there is an option to change the time it automatically triggers and/or to let me trigger it manually, I can't find it. I would like to.

Monday 20 December 2021

Black Home - Spoiler-Free Full Walkthrough and Achievement Guide with Maps

Intro


Black Home is a little RPG made by Warfare Games and published by Aldorlea games. It takes between 5-10 hours to play.

Using this Guide
  • In the guide below, I assume you're collecting all the treasure you have access to at any given time, so I'm not specifically telling you to do that.
  • Kill everything. Enemies don't respawn, which means there are very limited opportunities for level grinding. If you kill everything, you'll stay at a comfortable level and backtracking will be much easier. Also, killing everything makes it impossible to miss the achievements linked to collecting money.
  • The maps below are not a literal representation of the maps in the game. That is, their size and shape is more about the size they needed to be to show all the info.
  • If rooms are physically touching or linked by a line, that means there is a route between them.
  • Some routes don't open until certain points in the game. I've written the conditions under which those maps open in italics.
  • If squares are linked by arrows, that means that route is one-way.
  • On the maps, 'C' means chests, 'W' means wall. Throughout the game, you'll see patches of wall with a different texture, as in the image on the right. Once you've got the sledgehammer, start clicking on them. Some have items, others leads to hidden rooms.
  • If a square is teal, it means there's Holy Water on that map. Holy Water heals your party.
  • If a square is yellow, it means you can access another map from there.
  • As you play through the game, missions will appear in your mission log. Mission titles are in bold and surrounded by square brackets. If you're just stuck at a specific part, use that information to figure out where you are.
  • At various points, the text in the game refers to a broom. I think this item must have been dummied out at a late stage, because it doesn't seem to appear in the game. Without it, there's an area in the Attic you can't reach, but there doesn't seem to be anything very itneresting in there anyway.

Achievements
Following this guide should get you all but three achievements. I'd expect you to be missing Safety Foremost (save 50 times), 10 Hours Played, and Sweet Home. It's pretty easy to save 50 times - just keep clicking. After that, if you leave the game running until the in-game clock is over 10 hours, you should unlock both of the remaining achievements. In practice, the game didn't immediately unlock Sweet Home after 10 Hours Played for me. I had to close and reopen it to make it pop up.

Guide

Map 1A


  • [The Monastery] Collect the Caretaker's Key from the Nave.
  • [Vertical Steps] Collect the Meat Hook from the Caretaker's Loft.
  • Click on the silver glimmer on the left side of the Solarium.
  • Click on the silver glimmer on the right side of the Solarium, near the Holy Water.
  • [A Smashing Good Time] Examine the wall in the Closet Room.
  • [A Dose of Medicine] Speak to the person in the Library.
  • Read the books in the Alchemy lab/Water Closet.
  • [Rapunzel's Folly] Check the plants in the Alchemy lab/Water Closet.
  • Check the two silver glimmers in the south of the Alchemy lab/Water Closet.
  • Examine the 3 new silver glimmers in the Vermillion Monastery map.
  • Fetch the spade from the Caretaker's Room.
  • Examine the remaining silver glimmer in the Vermillion Monastery.
  • Return to the Alchemy Lab and examine the new silver glimmer in the upper right.
  • Speak to the person in the Library, then leave.

Map 2


  • [The Hooded Figure] Collect the Rusty Key from the Water Closet.
  • Collect the Ruby Amulet from the Dining Hall
  • Place the amulet on the statue in the 2nd Floor Hallway
  • Open the chest in the Collapsed Room, then examine the silver glimmer.
  • [The Way Up] Go to Tower - 2nd Floor, then go back to the corridor when you can't continue further.
  • Get the silver eye from the Dust Room and put it in the Statue in the Garden Fountain Area.

Mines


  • Take the wooden plank from the chest in Mineshaft 3.
  • Examine the silver glimmer in the central part of Mineshaft 9.
  • Pull the 2 switches in Mineshaft 8.
  • Examine the silver glimmer in the top right of Mineshaft 5 after a scripted battle.

Map 2
  • Now you have the pickaxe, go and find out what's down the stairs from the Second Floor Hallway (marked "????"). Then come back and tell me because I forgot to do that.
  • Make sure you've collected all the treasure from this map.
  • [Hammertime] Work your way to the top of the Bell Tower.
  • [Bad Religion] After the scene, go to the Crypt via the Ruined Room

Crypts


  • Crypts 1, 2, and 3 have a modular structure. The detailed maps show which modules contain treasure (C) and stairs (^). Notice that Crypt 3 has an extra room in the middle.
  • [The Dead] After picking up the torch, light every candle you come across. Don't forget to backtrack for the two right at the start.
  • Examine the silver glimmer in the centre of the third floor crypt.
  • When you've lit all of the candlesticks (you lose your torch), go through the door in the north of the third floor crypt and press all three switches.
  • After you've found all the treasure, talk to the person at the far end of the cave, near the locked door.
  • [Ray of Hope] Head to the Saferoom. Pull the switch before you go up the ladder.


Map 1B


  • [Ear to the Ground] Head through the Nave (Map 1A) to the Secret Room and examine the silver glimmer.
  • Head towards the Sun Room. If you leave the Corridor without defeating the enemies and then re-enter, they'll still be there, but they'll be invisible.
  • Examine the statue in the Sun Room and choose 'yes' to unlock the Secret Room.
  • Do not step on the cracked tile in the Greenhouse (right). It's an instant Game Over.
  • Work your way around to the centre of the Greenhouse. Read the book, then examine the candle on the table nearby. You'll need to be standing on the uppermost tile to interact with it.
  • With the candle extinguished, examine the Sunflower (a bit up and left) and choose 'yes.'
  • Examine the two silver glimmers in the Hall, and the two in the Store Room.
  • Head to the Kitchen, then the Store Room.
  • Examine the silver glimmer at the top of the Dining Hall.

Map 3 and Aquaduct


  • [The Dank Path] Make your way through the Aquaduct and onto Map 1A. The Aquaduct is a maze, hence the extra map.
  • Examine the silver glimmer in the Rookery.
  • Examine the two silver glimmers in the Library.
  • [Bombs Away] Collect the last few chess pieces from this map and place them on the chessboard in the treasury (images below).
  • In the Hall of Portraits/Oil Room, take the torch from the wall near the entrance to the Guard House. It isn't marked.
  • Examine the silver glimmer in the lower part of the Hall of Portraits/Oil room.


Crypt
  • Go through the cave and look through the window again.
  • SAVE HERE
Good Ending
  • Do not take the Spawn Egg in the Nest.
  • Defeat the enemy in the Paddock.
  • Defeat the enemies in the Temple.
  • Speak to the person on the stage.
Bad Ending
  • Take the Spawn Egg in the Nest.
  • Go to the Temple via the Underchamber and Paddock, and talk to the person on the stage.

Tuesday 14 December 2021

Shadows and Lies - Quest Guide

Quest Title Unlocked Completed
Wayward Daughters Plot Related, Automatic. Plot Related, Automatic. Spoiler: [You will not see this quest completed because its end is the end of the game.]
#1 Dathan's Class Plot Related, Automatic. Plot Related, Automatic.
#2 A Family Vanishes Stop by the Portran's Farm after meeting Eva and Kris. It's just south of secret room #5 on the world map. You cannot complete this until the final dungeon. Speak to Portran in Divide 1. He's invisible until you're right in front of him. If you walk around the rooms hugging the walls, you can't miss him.
#3 A Farm Girl's Letter Fellip's Farm, just west of secret room #5. Speak to Gerda. Deliver the letter to Tomma in Peatfall. Note that you will be thrown into an enemy-filled area after doing so. You can cast egress to immediately get back to town if you need to, but you'll only be able to access a limited section until you complete Quest #5.
#4 Get out of Jail Automatic, after completing Quest #3. Plot Related, Automatic.
#5 Earn a Reward Automatic, after completing Quest #4. Defeat the Bandit King in the house in Eastern Hills.
#6 Another Wayward Daughter Speak to the owner of the pub in Peatfall. It's in the harbour. Same resolution as Q #9.
#7 The Darkened Lighthouse As you speak to people in Clifton. I think it may be impossible to miss this one. Complete the lighthouse dungeon then return to the pub.
#8 The Defrauded Armorer Speak to the Armourer in Dorgate. Complete the Falmount Manor dungeon then return to the armourer.
#9 Missing in Action Accept the job when Granny Norwood offers it. Find Granny's servant in Landow. You're looking for a trapdoor.
#10 Lost Statue Automatically with Q #9. After finding Granny's servant, check the cell next door for a hidden room.
Find all the Secret Rooms Automatic There are 27 on normal mode. I cannot write a guide better than this one, so I won't try. When you first enter, you'll see 1 of 30, but that seems to be a mistake. There are 30 secret rooms in other games by Aldorlea, so perhaps they just copied a bit of code over and forgot to edit this part.

Thursday 2 December 2021